JohnnyBro's How To Draw Manga has relocated to the following site:
johnnydrawsmanga.com
Please visit us for more tutorials! Thank you
How to Draw Manga Hair
Drawing dynamic hair in manga adds an extra layer of personality to your characters. In this post, I'll show you how to draw manga hair.
As we all know, hair is made of many individual strands. However when drawing manga hair what manga artists normally do is to draw them in clumps and groups. As you can see in the drawing above, there are many ways to accomplish this.
Next, you need to understand that hair doesn't just grow from all over the head. Above I have shaded the parts of the head that hair grows out from. Manga characters have a hairline as well, so take caution not to draw the hair growing from above the hairline so that they don't look like they're balding.
Make sure to draw the outline of the hair at a sufficient distance from the head to give volume to your manga character's hair. A common mistake is to draw the hair very close to the head without giving enough space between them. You can vary the distance to create different looks e.g. shorter distance for thinner hair and longer distance for puffier hair.
The direction of hair growth is typically on a spot behind the back of the head. Look at the picture above to see how hair grow out from the spot marked 'x'. This of course doesn't mean that all hair grow out from that one spot, but instead it means that all hair moves away from that spot.
Hair Movement
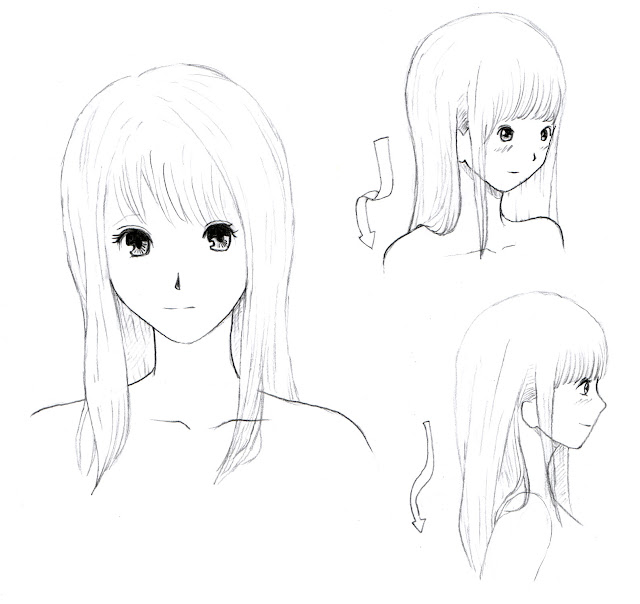
Manga hair isn't a rigid part of the body, and so you shouldn't draw them in a static manner. When a girl manga character with either long or short hair moves, draw their hair moving in the same direction as the wind is blowing. Wind isn't the only thing that creates hair movement, gravity affects the hair as well. In the bottom right picture above, gravity causes her hair to fall down towards the ground.
There are two types of manga hair that are commonly found: straight hair, and curly hair. To add variety to your character's hair style, try changing the degree of curliness. Curly hair that is less pronounced (i.e not so curly) is sometimes called wavy hair.
Hair Type: Straight Hair

Straight hair in manga is somewhat straight forward to draw. After outlining the hair, draw many lines that follow the curvature of the hair to indicate straightness. Another thing to note when drawing manga hair is that it curves around the shoulders before falling straight down again.
You don't always have to draw manga characters with 100% straight hair; straight hair often curl slightly at its ends. The picture above from left to right shows 1) straight hair with slightly curling ends, 2) straight hair tied at its ends, 3) straight hair with very curly ends, and 4) completely straight hair.
Hair Type: Curly/Wavy Hair
There a two basic ways of how to draw curly manga hair, one is with the "C" shape and the other is with the "S" shape. As the curliness increase, extend the "S" curl longer.
Below is a picture of a generic girl manga character with her hair drawn using the "C" shape. Notice that the direction of the curl can be towards the center, away from the center, or towards a single (left or right) side.
Next up is a step by step guide on how to draw manga hair using the "S" curls.
Step-by-step: How to Draw Manga Hair Curly
Step 1First, draw the shape of the head. In this tutorial I will focus on the hair, so all other features e.g. eyes, etc have been drawn in.
Step 2
Lightly sketch in the overall shape of the hair using many different "S" curves. At this point, your drawing can be messy since the pencil marks are still light.
Step 3
Continue to draw in more "S" curves and add in additional details e.g. an extra curl at the top left.
Step 4
Once you are satisfied with the shape of the hair, continue by darkening only the lines that you wish to keep.
Step 5
Next, erase unnecessary line such as the head outline that is covered by the hair.
Step 6
I would normally draw in the face at this point, however you can do that later as well.
Step 7
Color in the hair by drawing parallel lines. In this example, I drew the lines from left to right only. What this means is that when the pencil tip reaches the right, I will lift the pencil up and start from the left again instead of drawing a line from right to left.
Step 8
Finish shading the hair. Notice that you don't have to draw long pencil strokes across the entire width of the hair. Instead, combining smaller strokes is sufficient as well.
The completed drawing. In the next tutorial I will show more on how to color and shade the hair.Thanks for reading this tutorial and stay tuned for more to come in Part 2 of my How to Draw Manga Hair tutorial.
To be continued in Part 2


